
Monday, February 04, 2008
Virtualization Apps for the Mac
Vmware Fusion is program that I find invaluable. If you are like me and you have created a Bootcamp partition for use with Windows, you will love this program. Instead of rebooting into windows every time I have to use a windows specific app, I fire up Fusion and it runs my bootcamp partition while in the Mac OS. I still have the option to boot windows natively but it isn't necessary. Another feature of Fusion is Unity mode, which allows you to run both OS's at once. It appears as though you are in OS X but you can run windows apps and have them minimize to the dock, pretty fun. Parallels desktop is another application that does most of the same things as Fusion. I have tried both products but I like Fusion for the fact that you can assign multiple processors and you can address more Memory to your VM's. One other thing to mention about these technologies is that you can download pre-built virtual appliances (Disk Images) for testing... for instance you could get the latest beta of windows server 2008 or run the latest distro of Suse linux, already configured and ready to boot.

Wii can play backups
After cracking one of the DVD's for the Nintendo Wii, I wanted to find a way to create and play backups as to not damage other disks (uh yeah).
I did some research and picked up a Wiikey modchip.

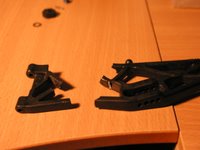
I am not going to go into detailed steps but I will link to some resources in the event you want do mod your own wii. A quick overview just to describe the pictures. First you crack open the case, a special tri-wing screwdriver is needed. Once you have the wii dissected, identify the solder points on the underside of the DVD drive and solder in your wires.

Once you have the wires soldered to the DVD drive you slide in the chip, bend and cut the wires to length, then solder those snipped ends to the wiikey.

It really isn't that hard to do but let me emphasize how small the solder points are. I had to look through a magnifying glass just to make sure things were attached. There isn't alot of room for error. The key is to tin your wires and only apply the iron for a split second, if you do not you will damage your wii.
All the info you need can be found here
enjoy!
I did some research and picked up a Wiikey modchip.

I am not going to go into detailed steps but I will link to some resources in the event you want do mod your own wii. A quick overview just to describe the pictures. First you crack open the case, a special tri-wing screwdriver is needed. Once you have the wii dissected, identify the solder points on the underside of the DVD drive and solder in your wires.

Once you have the wires soldered to the DVD drive you slide in the chip, bend and cut the wires to length, then solder those snipped ends to the wiikey.

It really isn't that hard to do but let me emphasize how small the solder points are. I had to look through a magnifying glass just to make sure things were attached. There isn't alot of room for error. The key is to tin your wires and only apply the iron for a split second, if you do not you will damage your wii.
All the info you need can be found here
enjoy!
Friday, February 01, 2008
New Notebook - Enter the MacBook Pro
I changed jobs a few months back and I had to return my laptop, so It was a perfect opportunity for me to buy a new piece of equipment (the 13 other laptops I own weren't good enough). With the adoption of the Intel chipset for the Apple platform the Apples had been looking more and more appealing. Let me state that I am no stranger to the mac. I have 2 older G4's and iMac G5 and a PowerBook, but I was never ready to make the switch while living and working in a windows world.
So once Apple moved to Intel and once I was able to run Windows natively, I knew I had to have one. I bought the laptop and voided the warranty the same week. I cracked it open and loaded it with 4GB of DDR2 PC 5400 RAM and threw in a Seagate Momentus 200GB 7200 rpm SATA Drive......It's blazing! BTW, I bought the 2.4GHz Core 2 Duo in a 15" wide with the back-lit LED display. The Display is gorgeous, HD movies look unreal!

So once Apple moved to Intel and once I was able to run Windows natively, I knew I had to have one. I bought the laptop and voided the warranty the same week. I cracked it open and loaded it with 4GB of DDR2 PC 5400 RAM and threw in a Seagate Momentus 200GB 7200 rpm SATA Drive......It's blazing! BTW, I bought the 2.4GHz Core 2 Duo in a 15" wide with the back-lit LED display. The Display is gorgeous, HD movies look unreal!

New hobbies - Sony Alpha Digital SLR
OK, The hobbies have changed, I still like the R/C stuff but I have shifted focus for the time being Hopfully I will keep up with my posts and update more frequently.
It's been about a year now since I got this "Bad Boy", I was taking photos of my Orchids (another hobby) with my Olympus c40-40 and I was not able to get the effect I was looking for with the old point and shoot. I convinced my wife the I "had" to have this Sony so we bought it. Not knowing much about photography in general, I surely didn't know what I was getting into. Anyway this camera is probably why I don't do much R?C anymore.. Too much time spent learning Photography. I have since purchased a bunch of lenses and tripods, a flash, bags and backpacks, a light tent, a bounce reflector, and the list goes on.

It's been about a year now since I got this "Bad Boy", I was taking photos of my Orchids (another hobby) with my Olympus c40-40 and I was not able to get the effect I was looking for with the old point and shoot. I convinced my wife the I "had" to have this Sony so we bought it. Not knowing much about photography in general, I surely didn't know what I was getting into. Anyway this camera is probably why I don't do much R?C anymore.. Too much time spent learning Photography. I have since purchased a bunch of lenses and tripods, a flash, bags and backpacks, a light tent, a bounce reflector, and the list goes on.

Saturday, February 24, 2007
It's been a while
I kinda let the blog stagnate for a while. But I'm giving it a little love now.
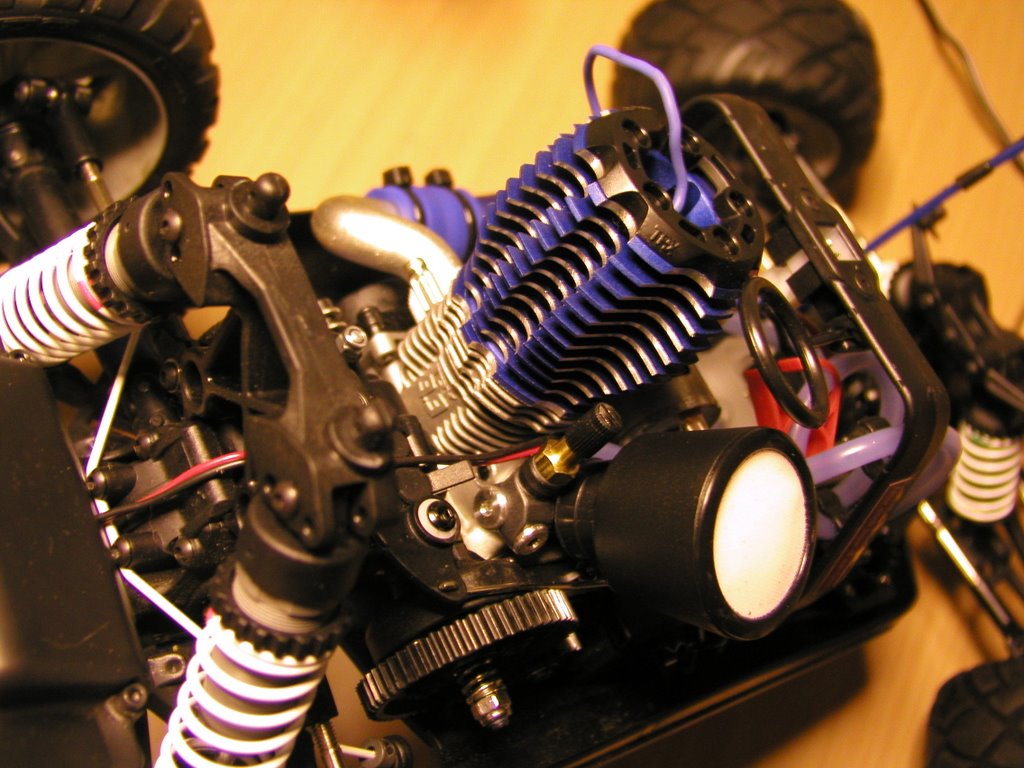
As for the Hellfire I dumped alot more money into it. I pulled the stock engine out of it and installed a Racers Edge Surefire32 engine and I am really pleased.
Here is a list of some of the other things.
As for the Hellfire I dumped alot more money into it. I pulled the stock engine out of it and installed a Racers Edge Surefire32 engine and I am really pleased.
Here is a list of some of the other things.
- Changed out the 13t clutchbell and installed a 16t clutchbell to add a little more top end.
- After adding the new items I ended up chewing up the center differential due to the added torque of the new engine and new clutchbell.
- Replaced the bent shock towers
- Replaced the center diff cup, which was originally plastic, with a machined aluminum one.
- Rebuilt all of the differentials and changed out the diff oils. I went for a 7K, 3K, 10K oil setup.
- Changed the shock oil weight for better handling.
- Airbrushed a new body as the stock body was trashed.
That is all I can think of right now. I will add some more pictures when I get home.
Money into the Hellfire:
$300 for the various parts mentioned above.
Total so far
$940
Monday, December 18, 2006
Hellfire - Bashed
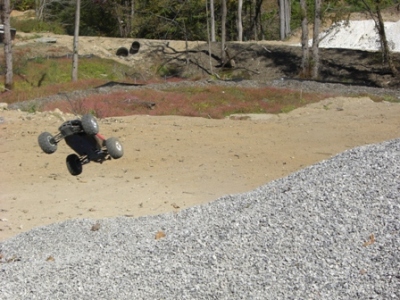
I had the bright idea that I would take my shiny new Hellfire down to the local BMX track, what a blast!!! I had a great time! I ended up beating the shit out of it... but it was so much fun. 


I ended up bending the rear shock tower ( note the aluminum piece between the rear tires) I also scratched the body up pretty well, but that always happens when you land upside down!. I finally got the hang of how the Hellfire jumps and was able to get it to fly and land perfectly.
I have started modding the Hellfire, not that it needed it, but that's just what I do. In the picture the exhaust pipe is an aftermarket OFNA jammin JP1, it rules, it adds alot of torque.

Money into the Hellfire:
$40 Jammin exhaust from of EBAY
Total so far
$640
HPI Hellfire
It has been a long time since I have posted to the blog and a lot has happened with regards to my hobby habit. I found myself wanting a little more out of an R/C truck. The Jato was great for it's speed and durability, but I was limited in where I could drive it. I wanted a 4 wheel drive truck and had a ton of choices. Most of the guys that I run with have Traxxas Revo's or HPI Savages. I,being me, wanted something different,so I started my search and to make a long story short I settled on the HPI Hellfire. I love this "Truggy". Yes that's right it is called a Truggy, I guess it is a cross between a truck and a buggy. The RTR version was kind of steep at $600, but I wanted it. Here is a pic in it's pristine state.


Money in the Hellfire pit
$600 Hellfire RTR
Thursday, November 16, 2006
Jato - Updates
Well it's been a while since I last posted. I have bought many parts and the Jato has changed quite a bit since the last blog entry. As I mentioned in the last post I bought the Proline Moab tires. I was having a heck of a time keeping the tires glued to the rims, I guess too much torque. Due to the glue problem I bought 2 new Proline rims and two new Moabs for the rears as well as some new tire glue. The tire glue was what did the trick!! My other tire glue sucked! this new tire glue also from Proline came with a really small piece of tubing that fits under the bead of the tire and aids in getting the glue right where you need it, also the fact that the CA is so thin capillary action helps getting the perfect fit. The tires are perfectly glued and not budging now.
I felt it necessary to buy some new "street" tires as well, I think each type of tire has it's purpose and the Moabs are definitely for the dirt. I bought the Proline Agitator rims and the Road Rage II tires. The Agitator rims give me many more choices for tire patterns than the Traxxas rims, with the Traxxas rims you are limited to about four different tread patterns. Anyhoo that is enough about tires.
My stock body has been totally thrashed from all of the jumping and bashing I have been doing so I grabbed a Proline Crowd Pleazer clear lexan body that I had to paint myself. I was really psyched for task of painting the body. I have an airbrush and also had some left over Spazstix paints from my T-Rex canopy painting project. I decided on the red and chrome fade. Spazstix paints are really cool. The paints spray on semi-transparent and require quite a few coats to get the full effect, but after you spray a solid backer over the topcoat the effect is really neat, almost like a candy coating. If you use the chrome as a backer it gives an anodized look.

Broken parts...
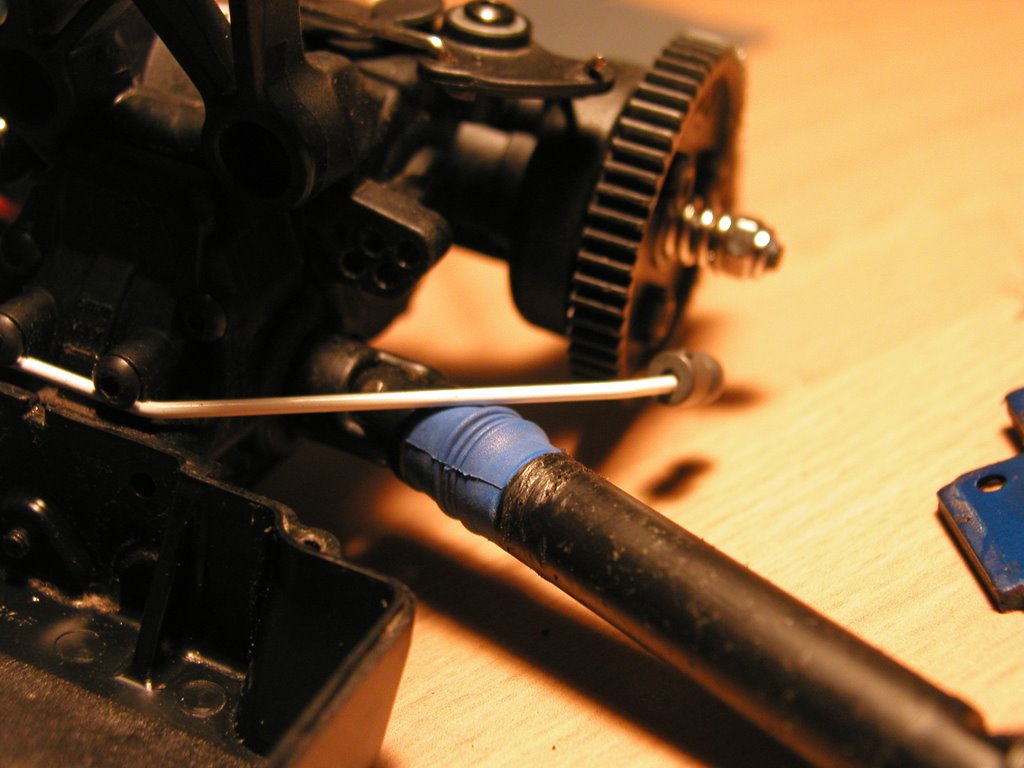
I broke the front A-Arm this time and replaced them with the blue RPM parts. I also picked up some shock towers and body mounts knowing that I will break them soon. I also had to replace a broken spur gear and I also grabbed an extra.
The truck was having some steering binding issues so I bought an aluminum drag link that has bearings, this fixed the issue.

I will estimate what I spent on the parts to keep with the theme of this blog and that is wasting money.
4x Proline Road Rage II tires
6X Proline Agitator rims
2x Proline Moab tires
Proline tire glue
$98 from amainhobbies.com
RPM A Arms
$12 from Danbury Hobby Center
Drag link
$16 from Ebay
F and R shock towers
$12 from Ebay
4x glow plugs
$20 from Danbury Hobby Center
1/2 glallon fuel 25%
$22 from Danbury Hobby Center
1 gallon fuel 20%
$36 from Danbury Hobby Center
2x spur gears
$10 from Ebay
Lexan body
$25 from Ebay
Money into the Jato
Sub Total
$226
Total so far:
$892
I felt it necessary to buy some new "street" tires as well, I think each type of tire has it's purpose and the Moabs are definitely for the dirt. I bought the Proline Agitator rims and the Road Rage II tires. The Agitator rims give me many more choices for tire patterns than the Traxxas rims, with the Traxxas rims you are limited to about four different tread patterns. Anyhoo that is enough about tires.
My stock body has been totally thrashed from all of the jumping and bashing I have been doing so I grabbed a Proline Crowd Pleazer clear lexan body that I had to paint myself. I was really psyched for task of painting the body. I have an airbrush and also had some left over Spazstix paints from my T-Rex canopy painting project. I decided on the red and chrome fade. Spazstix paints are really cool. The paints spray on semi-transparent and require quite a few coats to get the full effect, but after you spray a solid backer over the topcoat the effect is really neat, almost like a candy coating. If you use the chrome as a backer it gives an anodized look.

Broken parts...
I broke the front A-Arm this time and replaced them with the blue RPM parts. I also picked up some shock towers and body mounts knowing that I will break them soon. I also had to replace a broken spur gear and I also grabbed an extra.
The truck was having some steering binding issues so I bought an aluminum drag link that has bearings, this fixed the issue.

I will estimate what I spent on the parts to keep with the theme of this blog and that is wasting money.
4x Proline Road Rage II tires
6X Proline Agitator rims
2x Proline Moab tires
Proline tire glue
$98 from amainhobbies.com
RPM A Arms
$12 from Danbury Hobby Center
Drag link
$16 from Ebay
F and R shock towers
$12 from Ebay
4x glow plugs
$20 from Danbury Hobby Center
1/2 glallon fuel 25%
$22 from Danbury Hobby Center
1 gallon fuel 20%
$36 from Danbury Hobby Center
2x spur gears
$10 from Ebay
Lexan body
$25 from Ebay
Money into the Jato
Sub Total
$226
Total so far:
$892
Monday, October 09, 2006
Jato - New Tires
Here is the Jato with new shoes, as I mentioned in my previous post I got the ProLine Moabs. I was limited to the street as the stock tires were useless on grass due to the horse power this thing puts out, now I am free to go almost anywhere. These shots are from a construction site in my town.

I love this thing! I am going to upgrade a couple of things. First I have buggered up the steering servo so I will be replacing it soon.
I also want a K & N air filter and an aftermarket tuned exaust. I will also be upgrading my suspension and maybe swapping out my A- Arms for CNC'd aluminum.
That's it for now.
Wednesday, October 04, 2006
JATO- Crash
Ok, so, I have got the JATO all broken in and it's running great. Once again it is fast! I had my first bad crash with a broken part. I destroyed the rear "A" arm. I ran doen to the LHS and grabbed an aftermarket replacement from a company called "RPM" this "A" arm is made of better material than the stock part. The RPM part cost $12 for a pair. The install process was a real pain. I had to remove everything from the motor back to get at the shafts that hold "A" arm to the frame. (see pic) I had to buy more nitro fuel which was pretty pricey $34 a gallon sheesh! I bought an exaust deflector so that the unburnt fuel doesn't blow all over the rear wheel and rear axel, it really gets messy without it. I also orddered a new set of rims and tires. The stock rim for the JATO is a 2.8" rim which looks really good, but we are limited to only a handful of different tires and tread patterns. I opted for a 2.2" rim that allows me to choose from at least 30 different tire patterns. I went with the ProLine agitator rim and the ProLine MOAB tires. The MOAB tires have a more aggressive tread and have a larger total diameter (5") this will give me more clearance and a better traction in grass. One of the tricks of the tire mounting process is to wrap the inside of the tire with duct tape. Wrapping the inside of the tire prevents the tires from "Ballooning" at high RPM. Ballooning is when the centrifugal force stretches the rubber of the tire making it 2x it's original size, it can also cause the tire to explode. I will post more pics when I mount the new tires.


Money In the Jato Pit:
$42 Fuel and exaust deflector from LHS
$50 tires and Rims from amainhobbies.com
Total so far:
$641


Money In the Jato Pit:
$42 Fuel and exaust deflector from LHS
$50 tires and Rims from amainhobbies.com
Total so far:
$641
Thursday, September 28, 2006
More RC
Well I bought something to keep me going while I fix my heli. I bought a Nitro stadium truck and it's sick!! I got the Traxxas Jato 3.3. This truck screams. I does 0-60 in about 4 seconds and tops out at 65 MPH. I am really lovin' this on my lunch break. I had previously tried to fly the T-Rex during lunch at the RC airfield near my work but I found it too windy(near the beach). So now I can rip around the parking lots with the Jato instead. Did I forget to mention that it will do a wheelie @ 40MPH while throwing a rooster tail of dirt. Smokin!


Money into the Jato pit:
$549 for kit batteries fuel and tools @ LHS


Money into the Jato pit:
$549 for kit batteries fuel and tools @ LHS
T-Rex - Crashed again
So I went to my personal field, the cemetary, to get in a couple of flights and was surprised to find a bunch of people burying someone in my field...bummer. I decided to go to a different location to fly. The other location was different in that there was no flat surface to take off from. I tried it anyway and you can guess the rest. I think I got some grass caught up in the tail rotor or something. Needless to say I crashed again. The crash wasn't that bad I had all of the parts to fix the problem but I am still re-setting up my head. I am still struggling with getting equal positive and negative pitch on the blades. Anyway the saga continues.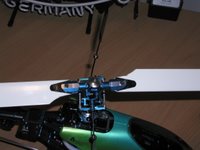

Crash analysis:
2 dented blades but still useable
bent flybar
bent feathering shaft
bent main shaft
main gear shredded


Crash analysis:
2 dented blades but still useable
bent flybar
bent feathering shaft
bent main shaft
main gear shredded
Thursday, September 21, 2006
T-Rex - Still tweaking
The T-Rex is still kicking. I have been flying as much as I can which isn't much due to how late I get home from work and how early it has been getting dark. I made some changes to the setup: First off I moved up to the 13 tooth pinion gear (the gear on the motor) this gives me more head speed, and creates more stable flight characteristics. I also bought some more batteries and 2 sets of "Gorilla Gear" landing gear, the stock landing gear is a joke and is very brittle. I also bought a digital caliper and a new Align hex wrench.


Money In the Pit
$138 batteries and Gear from RcHover
$10 Calipers from Harbor freight
Total so far: $1826.20

Money In the Pit
$138 batteries and Gear from RcHover
$10 Calipers from Harbor freight
Total so far: $1826.20
Friday, September 15, 2006
T-Rex - First crash
I finally crashed it! I m not a virgin any more. I totally dumb thumbed it right into the ground. With all the time I put into the build I didn't have time to fly on the sim and it shows. I have since made it a policy to fly every night regardless! I am about ready to get rid of the training gear, I know I can fly without them, I was just trying to protect my investment.
Crash Analysis:
Feathering shaft
Fly bar
Main Shaft
Main gear,
Landing gear
Pro Wood blades
I had most of the parts except for the landing gear, main shaft, and main gear. My LHS had everything I needed. The actual cost of the crash wasn't that bad... maybe $25, but I bought some extra parts that I know I will need for future crashes.
Here is a video of the crash http://video.google.com/videoplay?docid=-1279739640755098434&hl=en
I will be adding more pictures soon, my friggin server is not liking my usb 2.0 card and I am too impatient to transfer pictures @ usb 1.1 speeds.
Money in the pit:
$89.00 various parts from Hobbytown USA
Total so far:
$1678.20
Sunday, September 10, 2006
T-Rex - First flight
Well I got the heli in the air. The first flight was unremarkable in that it was just to see if everything was trimmed just right. I had to adjust a few of the links so that the heli wouldn't drift in any particular direction. I also found out that I had the rudder servo reversed...that means that the rudder input was backwards. Servo reversing is very easy to fix, you just go into the reverse settings on the radio and reverse that channel. Problem solved. I also decreased the negative pitch to -1 degree at low stick. The negative pitch set to -1 allows for a beginner (me) to have some room for error in the event of a panic low stick and prevents the pilot from slamming the heli into the ground. I have a video of my second flight. It is just another test flight.
My server crashed, therefore I had to rebuild my OS partition. I lost all of my heli pics as they were in my www root directory. I am getting good at installing and configuring exchange server... which is a good thing.
Here is the video link.....more to follow.
http://video.google.com/videoplay?docid=-2517156347215222977&hl=en
Thursday, September 07, 2006
T-Rex - Final Steps
The last steps involve programming the ESC, Setting up the gyro for heading hold, and creating throttle and pitch curves in the radio. To setup the ESC you must have the throttle stick in low position before you power the heli, once you do this you hear a series of beeps that indicate to the user which settings they have. I will not go into what all mean. One of the coolest things about this setup is the Gyroscope. The Gyro automatically adjusts the pitch of the tail rotors to compensate for the change in heading. So, whithout any stick input from me, if I move the tail to the right the tail pitch compensated by itself, and then when the movement stops the pitch returns to center. Is cooler than it sounds. I am not going to try and explain throttle curves.
Here is a quick little vid of my bird.
Money in the pit:
$56.85 Parts and tools from Readyheli.com
Total so far $1589.20
Here is a quick little vid of my bird.
Money in the pit:
$56.85 Parts and tools from Readyheli.com
Total so far $1589.20
T-Rex - Tuning the head
Well after waiting around for that receiver crystal (no not Dilithium)to show up in the mail and driving all over Connecticut looking for one, I had the brilliant idea to try the crystals from my other copter and guess what! they worked!! yeah so All in all it was a good thing because it gave me time to paint the canopies.
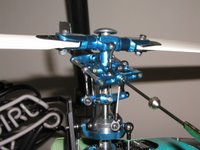
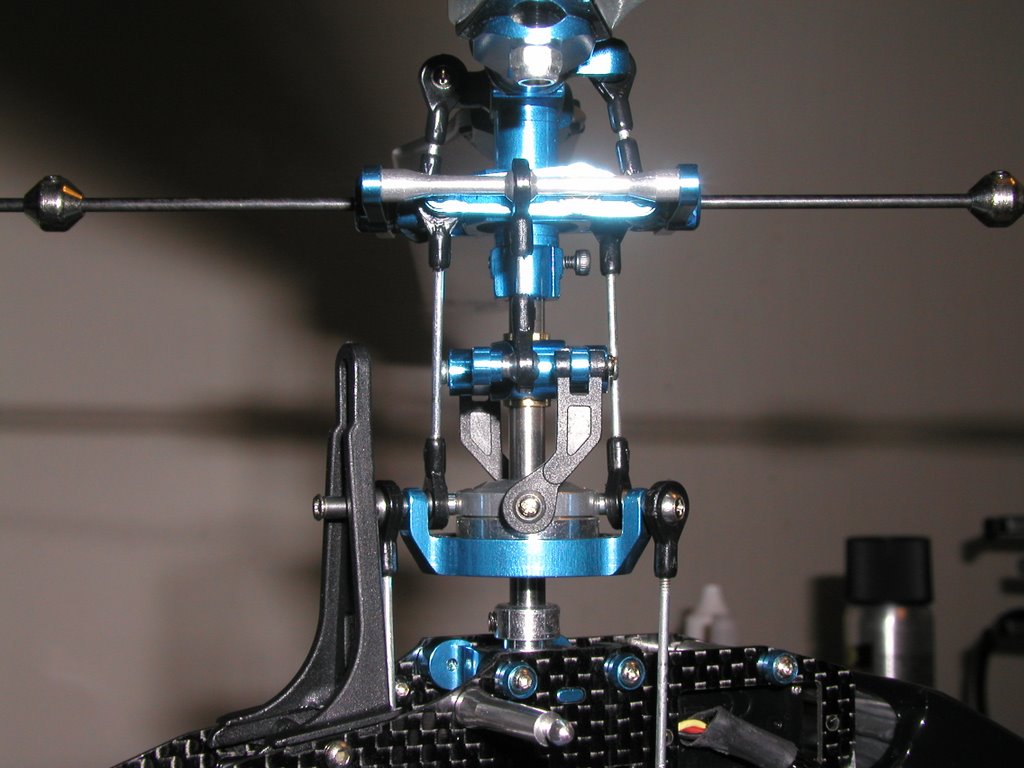
Ok, so the next step in the build process is to setup the servos, control arms and links to make the head operate properly and to allow the bird to fly smoothly. What a frigging pain in the Ass! It took me 2+ days to do this and I am still not completely satisfied. I will try to explain this process but I may not make sense. Ok the servo moves the linkages to the swashplate and that in turn changes the attitude of the helicopter. The linkages also control the pitch of the blades ot either increase or decrease the rate of climb. The trick to this head setup is to get all of the links to work together and control the heli. Lets just say it sounds easier than it is. I was cooked after this step, but I trudged on.

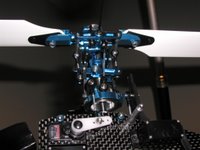
Ok, so the next step in the build process is to setup the servos, control arms and links to make the head operate properly and to allow the bird to fly smoothly. What a frigging pain in the Ass! It took me 2+ days to do this and I am still not completely satisfied. I will try to explain this process but I may not make sense. Ok the servo moves the linkages to the swashplate and that in turn changes the attitude of the helicopter. The linkages also control the pitch of the blades ot either increase or decrease the rate of climb. The trick to this head setup is to get all of the links to work together and control the heli. Lets just say it sounds easier than it is. I was cooked after this step, but I trudged on.

Friday, September 01, 2006
T-Rex - Canopy painting
Well I am waiting for the crystal for my receiver, it still didn't come in the mail. I was impatient so I drove up to 2 of my local hobby stores looking for that crystal..no luck. I did however buy some supplies to paint my canopy. I grabbed some primer and couple of bottles of airbrush paint and some datail masking tape 1/8" in width.
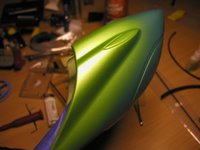
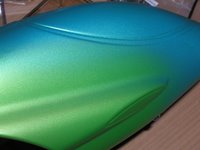
I had already trimmed the canopy flashing that is left over from the molding process. The next step is to scuff the surface with steel wool, or scotchbrite. Once the surface was scuffed I wiped it down with alcohol to remove the dust, I applied 2 coats of grey primer and let dry. I then wet sanded with 600 grit sandpaper. Now for the fun stuff. I happen to have an air brush and compressor so that was money I didn't have to spend. I applied a basr coat of yellow/green pearl and let that dry. I then followed up with a teal pearl fade from the nose forward and up the center. I am no pro with the airbrush but I am pleased with the result. Tomorrow I will be sealing it with multiple coats of clear so that it shines. I might try some accents with the airbrush prior to the clear if I can get the airbrush tuned properly.
Money in the pit
$38.75 Paints and supplies from Hobbytown
$39.69 color shift paints from Countdown Hobbies
sub total: $78.44
Total so far: $1532.39
I had already trimmed the canopy flashing that is left over from the molding process. The next step is to scuff the surface with steel wool, or scotchbrite. Once the surface was scuffed I wiped it down with alcohol to remove the dust, I applied 2 coats of grey primer and let dry. I then wet sanded with 600 grit sandpaper. Now for the fun stuff. I happen to have an air brush and compressor so that was money I didn't have to spend. I applied a basr coat of yellow/green pearl and let that dry. I then followed up with a teal pearl fade from the nose forward and up the center. I am no pro with the airbrush but I am pleased with the result. Tomorrow I will be sealing it with multiple coats of clear so that it shines. I might try some accents with the airbrush prior to the clear if I can get the airbrush tuned properly.


Money in the pit
$38.75 Paints and supplies from Hobbytown
$39.69 color shift paints from Countdown Hobbies
sub total: $78.44
Total so far: $1532.39
T-Rex - Tail servo and boom install
I finally received my Futaba 7CHP radio in the mail on Wednesday. In a previous post I mentioned that I am a dumbass, well would you believe that the only thing that I need is that receiver crystal that I ordered before I ordered my Radio....Grrrrr. A $12 part is preventing me from trimming this bad boy and getting it in the air. Oh well it's in the mail on it's way. Lesson learned.
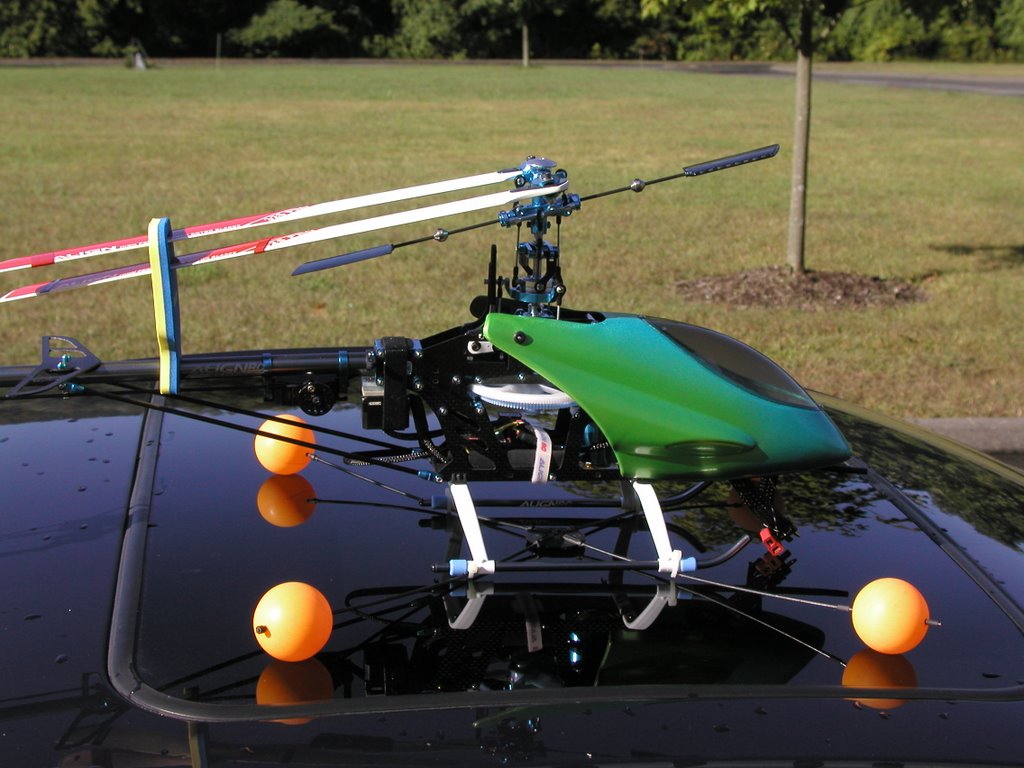
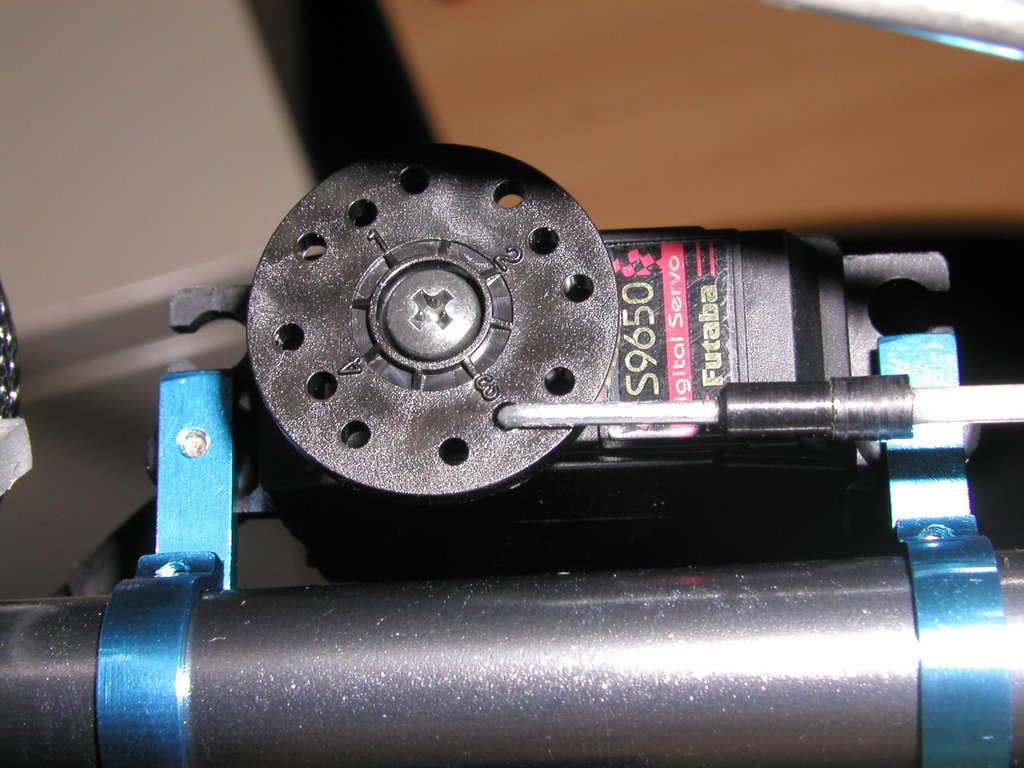
As the title of this post states I will show you some pics and and a brief summary of how my tail servo install went. Well as I have stated before the instruction manual sucks. It never makes mention of how to install the tail servo, so I had to call on the experts at helifreaks.com. My tail servo is the Futaba s9650, it works great with the futaba GY401 Gyro and both are the best for the tail setup for the T-Rex.
The general idea for the proper setup of the tail servo is to have servo arm, in this case the servo disc, be in line with the pushrod race that is built into the horizontal tail fin mount and the tail pitch ball link. (I know that was a mouthfull) In order to do this the servo needs to be on an angle. The orientation of the servo mounts themselves is very important as if you have them upside down the servo horn is too far away from the boom. It took me quite a few tries to get it right. One more note, I used the supplied rubber grommits and metal sleeves with the mount screws that came with the kit.

Tuesday, August 29, 2006
T-Rex - Install receiver/gyro and dressing up the wires
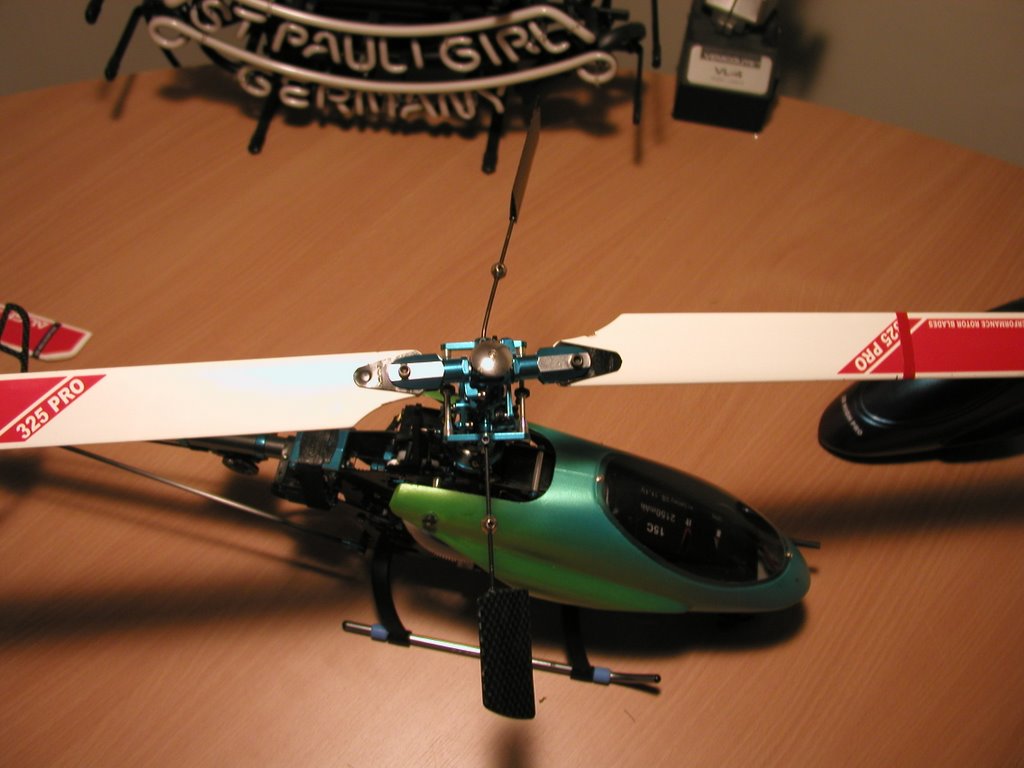
After I was done soldering my charger and batteries, I had time to add wire loom to the wires and plug things into the receiver, the receiver is mounted inside the frame. I also connected the gyro, but I need to figure out how to best manage the wires. The gyro attaches to an aftermarket mount the fits beneath the boom. If you mount the gyro above the boom like the manual states you run the risk of destroying your gyro in a crash as the flybar or blades can come in contact woth it. As you can see from the pictures there is a lot of extra wire on the gyro that I will have to loom and manage, some people shorten the servo lead but I am going to leave the extra wire on it in the event that I want to use it on anothe Heli in the future. I am eagerly awaiting my transmitter so that I can trim the servos and get the head set up and leveled.


Subscribe to:
Posts (Atom)